

Walk through any modern workshop in Warrington and you hear familiar sounds. Lasers cut clean profiles from flat sheet. Press brakes fold parts that will end up in vehicles, enclosures, or fixtures.
Local firms want consistent lead times and repeatable quality. Buyers want traceable materials and clear drawings. Teams that follow sound methods save time, reduce rework, and keep projects on budget.
Plan For Manufacture Early
Strong fabrication starts with drawings that match how parts are actually made. Flat patterns should account for bend radii and grain direction. Hole sizes should match the punches and tools available.
Firms that involve production early reduce late changes and scrap. Many North West buyers work with partners like Yorkshire Laser and Fabrication to vet drawings before cutting. That review often finds small tweaks that prevent cracks, tool marks, and misaligned fasteners.
Good practice sets clear tolerance classes in the title block. It also flags critical features that need extra checks. That way the right gauge, tool, and inspection plan are used from the start.
Choose The Right Material
Steel, stainless, and aluminium behave differently at the brake and during welding. Pick a grade and thickness that fit the load, corrosion risk, and finish needs. Ask how the sheet will be stocked to avoid part variation across batches.
Bend allowance depends on grade, thickness, and tooling. A small change in thickness can shift angles by degrees. Document the bend deduction values used, then stick to them across revisions.
Suppliers can advise on coatings, grain, and temper that affect cutting speed and edge quality. When you pick materials with the shop’s inventory in mind, you cut time and cost.
For background on welding fume controls and safe process planning, see guidance from the Health and Safety Executive, which covers risk control for hot work across metals.
Set Practical Tolerances
Set tolerances that match function, not habit. If a slot locates a sensor, hold it tighter than a trim edge. This keeps inspection focused and avoids paying for tight control where it adds no value.
Agree on a gauging method for key features. Use go and no go pins or a simple fixture at goods in. That catches drift before it reaches assembly and stops issues spreading across batches.
Plan a short run before full release. Ten to twenty parts give data on angles, spring back, and hole position. Small tool or program changes at this stage save weeks later.
Map A Clear Process Flow
Routing is the order of cutting, forming, joining, and finishing. A clear route stops parts moving back and forth across the shop. It also helps teams see queues and adjust staffing.
A typical clean route looks like this:
- Program and nest parts to optimise sheet use and reduce offcuts.
- Cut profiles and mark part IDs where allowed by the brief.
- Deburr, form, check, finish, then assemble or pack.
Short setups unlock fast changeovers between part families. Group parts by material and thickness so tool changes are minimal. Keep formed parts protected from scratches with simple separators.
Process sheets should travel with each batch. They show the next step, the tool, and the check to run. A visible route reduces questions and keeps momentum during shift handover.
Build In Quality And Safety
Strong shops build quality into every step. They document programs, tool settings, and bend data. They track revisions and keep one source of truth for drawings.
Safety is part of quality. Good extraction at cutting and welding protects staff. Clear walkways, glove policies, and tagged lifting points keep teams safe and confident.
Compliance matters for buyers in construction and public projects. Ask how your partner handles traceability, material certs, and marking.
For a clear primer on structural fabrication conformity and control plans, review academic guidance that explains how process capability links to safe design outcomes.
CAD To Shop Handoff
Digital models are only as good as the data behind them. A clean CAD tree with named bends and features eases later edits. Flat patterns that match the machine library reduce manual tweaks at the controller.
Programmers should note pierce points, lead ins, and micro joints on small items. Operators then remove parts without warping edges. Consistent deburr gives better paint and powder results on racks.
Packing is not an afterthought. Use layer pads, part numbers, and photo sheets on the top carton. That helps the next team assemble faster and reduces calls to support.
Laser Cutting Basics
Fast cutting is useful, but edge quality pays off later. Clean kerfs reduce grinding before welding and painting. Good nests save sheet, but also protect formed tabs from heat.
Shops choose nozzles, gas, and feeds to match each material. Stainless may get nitrogen to keep edges bright. Mild steel often runs oxygen for speed, then receives a light burr pass.
Label parts where it does not conflict with hygiene or finish. If labels are not allowed, place a simple code in a non show area. This avoids mix ups in forming and assembly.
Bend Setup And Control
Tooling choice affects bend marks and angles. Use the same punch and die set across a family when possible. That gives repeat angles and consistent inside radii.
Forming programs should record back gauge steps and clamping points. Photographs of good parts help night shift teams. If you change a setup, save a new version and name it well.
Measure angles and hole centres after forming. This is the cheapest time to correct drift. Keep a small rework area clear and staffed to avoid blocking the main cell.
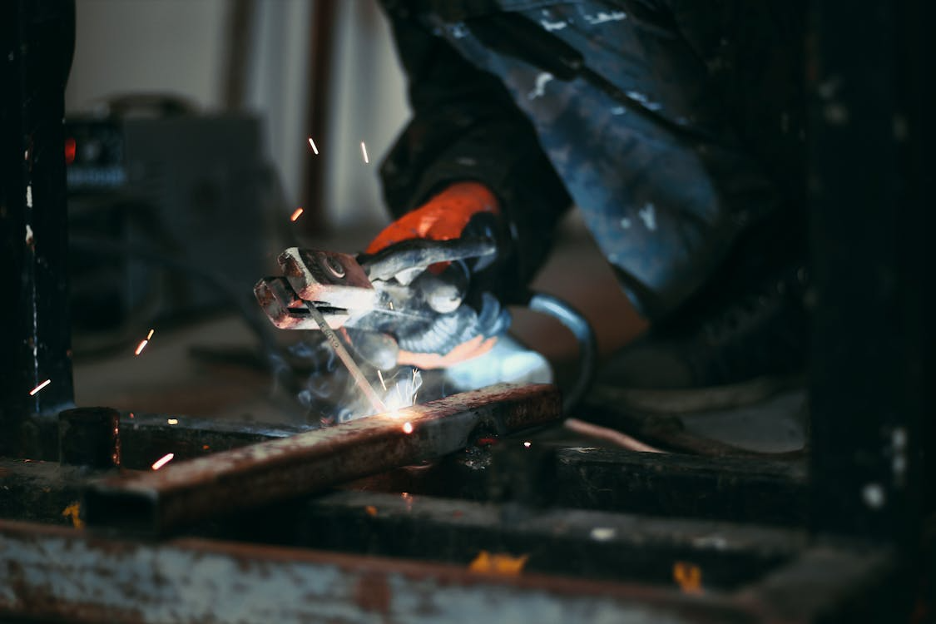
Smart Welding And Fastening
Pick joining methods that suit the material and load. Spot welds, MIG, TIG, and rivets each serve a place. The goal is strong joints with minimal marks and distortion.
Control heat with stitch welding or fixtures that pull heat away. Clamp surfaces that must stay flat. Let parts cool between passes to avoid shrinking and twist.
Select fasteners early and mark hole sizes on drawings. Consider clinch nuts or rivet nuts where access is tight. A small change in hole spec can speed assembly by minutes per unit.
Prep, Finish, And Pack
Surface prep decides the look and lifespan of the part. Clean edges make better powder coats. Mask threads and grounding points so parts assemble without scraping.
Dry fit assemblies before paint where possible. This checks hole alignment and catch points. It also helps you pack sub kits that make field assembly faster.
Book final checks into the route so they never get skipped. Confirm labels, counts, and cartons match the pick list. Good pack photos help your customer receive and build with confidence.
Work With One Trusted Partner
Local buyers often want a partner who can support the whole route. Cutting, folding, finishing, and assembly in one place cuts handoffs. It gives one contact for drawings, lead times, and support.
Partners with seasoned teams spot risks before they cost time. They bring ideas on fixtures, gauges, and order sizes. They can also flex capacity during peaks without hurting quality.
Warrington firms ship across the country. Reliable partners keep promises during busy seasons. Clear methods, good records, and trained staff make that possible on every order.
A solid process is practical, not flashy. Start with drawings that match the shop’s tools and limits. Route parts cleanly and check the few features that matter most.
Keep records tight and feedback open between design and the floor. Do those things well and your projects arrive on time, look right, and fit first time.


